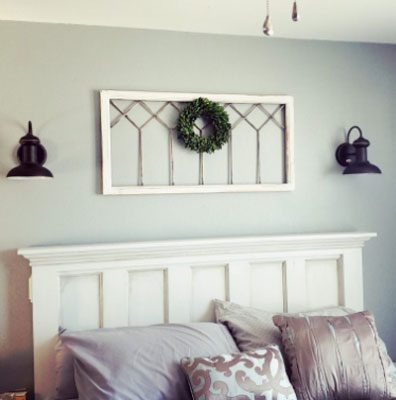
I am just bursting a the seams to share with you all what we did this weekend!!!! I designed a queen size headboard for our bedroom from a very heavy antique door and HandyHubs put it all together for me. Here’s how it all went down:
The idea to build a headboard from a paneled door is not a new one. I love scrolling Pinterest, and found the idea on there a few years ago; pinning it into my “someday” project board. I was fortunate to find a very heavy, very large solid oak vintage 6 paneled door at a Restore during one of my girl shopping weekends about a year ago. We stored it in the garage and waited for an opportunity to build the headboard.
There are several different ways to accomplish turning an old or new paneled door into a headboard. I’m sure you have seen them too. I was intrigued by the idea of just building a headboard and hanging it on the wall, without legs and considered going that route. Since I needed an entire new bed frame, I devised a plan: if I started with the headboard, HandyHubs would see the benefit in building a base too (more on that later…).
HOW we built our Headboard
We first measured the door and cut one of the panels off to make it shorter in width in order for it to fit a queen size bed, keeping in mind that we were going to add support legs and trim that would increase the width has well. (We found our necessary measurements by looking at other queen size headboard plans online)
Next, we cut 4- 2×4’s to the height we wanted to use as supports on either end. We decided that the door was too heavy to just Kreg the legs to the ends of the door and decided to notch them instead. To accomplish this, we stacked 2 of the 2×4’s and then glued and air nailed them together. This made them thicker and sturdier for support. We then measured the height of the door when it was laying horizontal and marked on the 2x4s from the top down to that measurement, then in 1″ from the edge of the 2×4. We used a handsaw to cut down the length of the 2 then in that 1″ measurement giving us a 1″ notch that the end of the door would sit on for support. Once we completed this on both ends, we attached the door by uses wood screws from the outer edge of the 2×4 frame into the end of the door. To cover up our stacked 2×4 legs, we framed each support on it’s 3 sides with 1x4s.
For the top of the door, I picked out some beautiful embellished molding and added crown molding along with a 1×6 at the top. We then wood glued, air nailed, and sealed up all crevices.
I decided to go with a white and gray theme for our bedroom furniture. To accomplish this, I applied one coat of General Finishes Empire Gray paint. Next I applied Vintage Market Chateau to add some dimension. I topped it all off with two thin coats of Dixie Bell Fluff. After I applied my last coat of chalk paint, I gave it a light sanding, which makes the chalk paint velvety soft and smooth. For my distressing on this piece I decided to use a wet distressing technique so that the under coat of paint would show through, but not the wood. To do this, I simply took one of my cotton t-shirt rags and moistened it with water, then rubbed it here and there until I achieved the desired effect.
The panels and molding were dressed up with Dixie Bell Grunge Glaze; the funest part! I applied the glaze on the inner edges of each panel, across the fancy molding and along the trim edges. Two coats of Dixie Bell Gator Hide were applied for the finishing touch to help protect all this work for the long run. I am positively in  with my new custom headboard!!!


