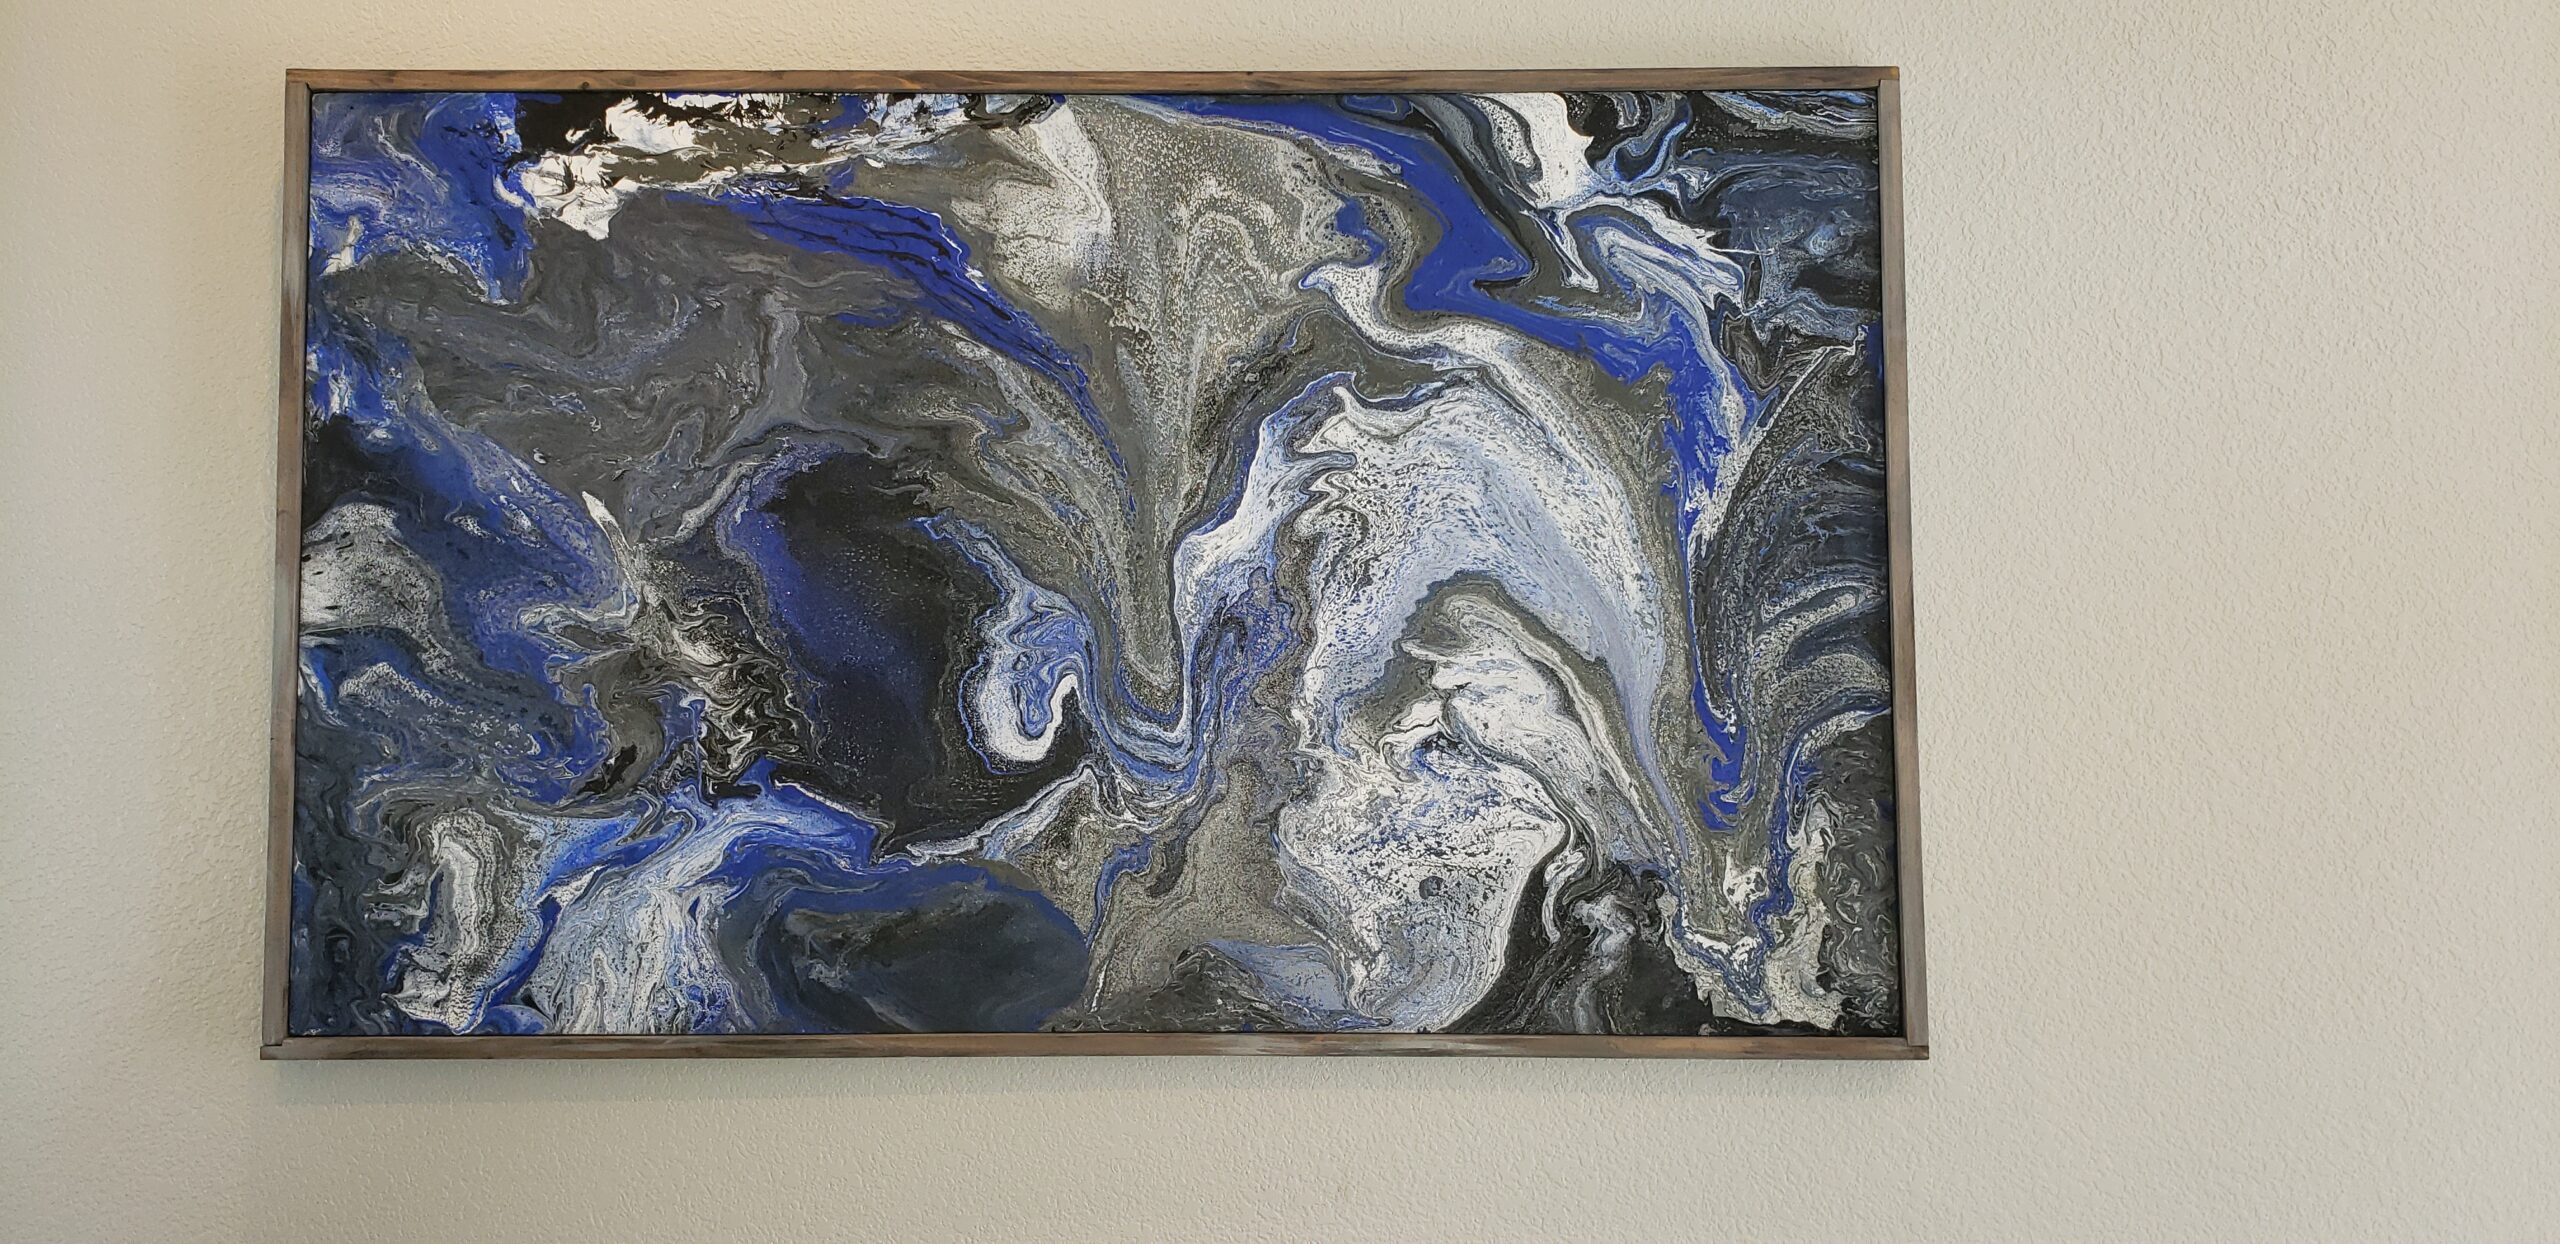
Hey there friends! Today I want to share with you an easy way to create gorgeous modern art for your home.
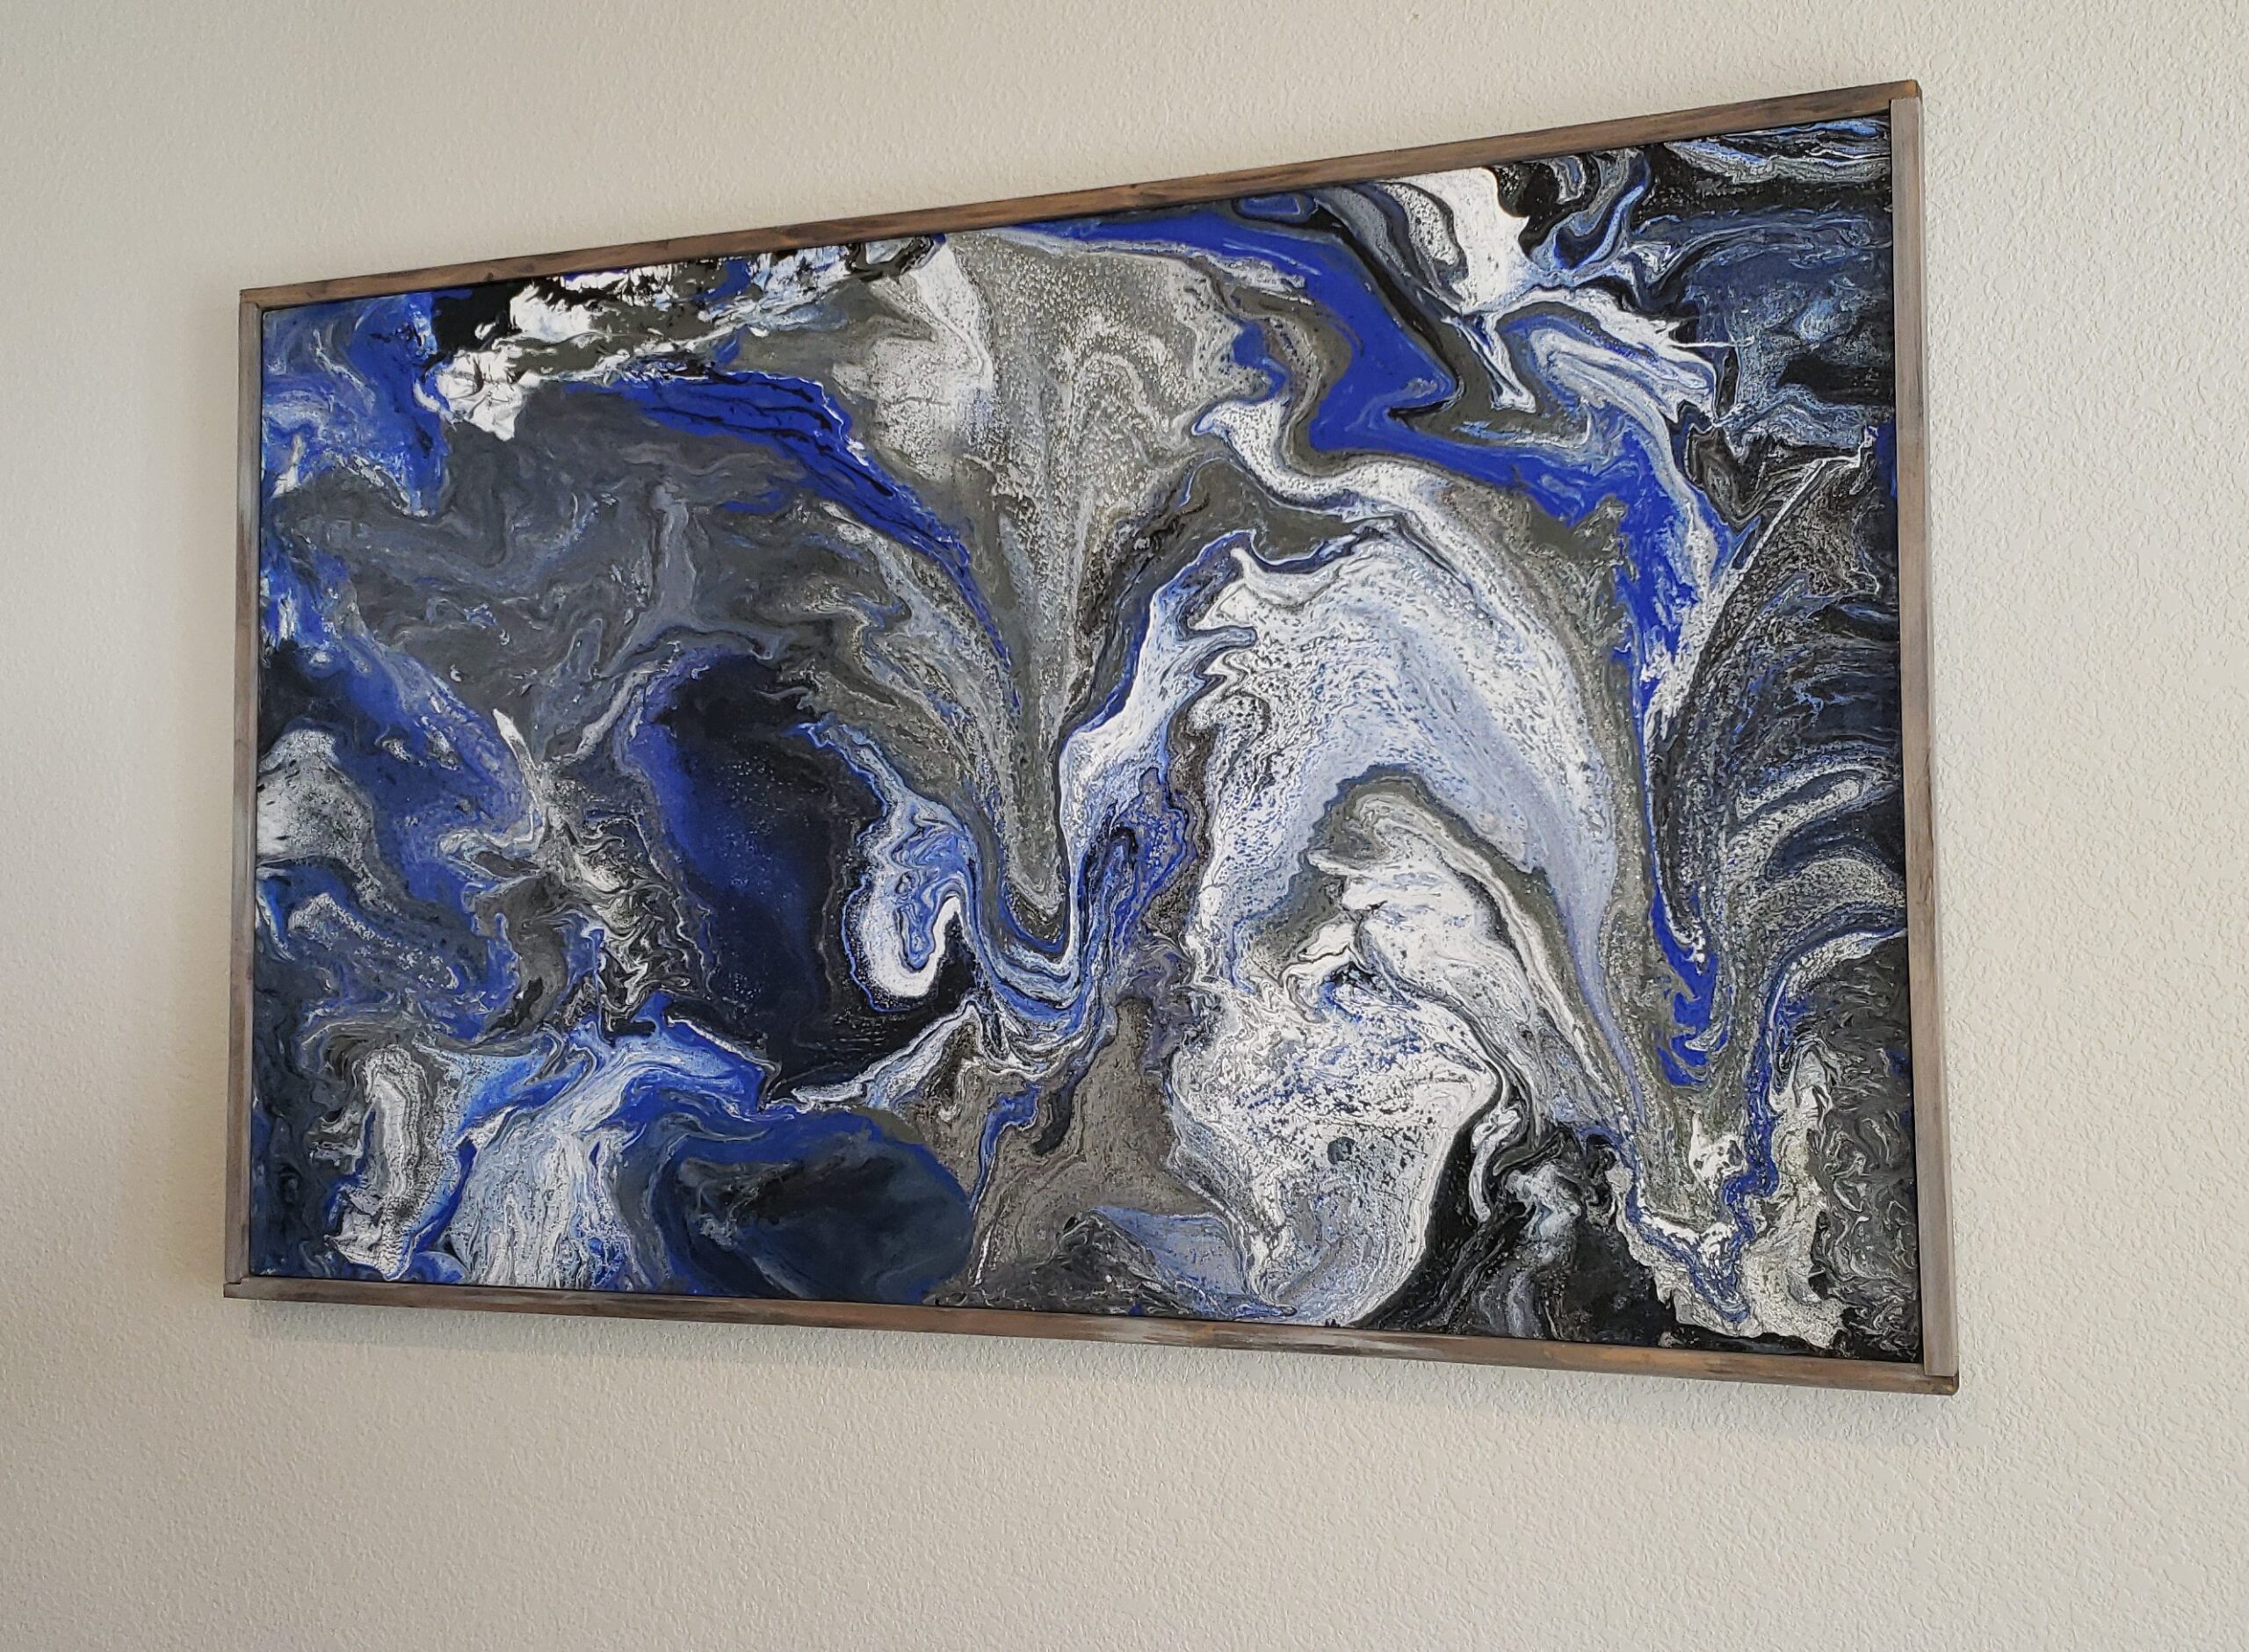
Modern! you may say – but yes. In our home, HH and I like to mix it up a bit – Farmhouse, Modern, Vintage, Industrial – you just never know what you might like. I have found that this flo art work is a beautiful addition to any home – AND – bonus here: What a great, inexpensive way to take care of those big awkward wall spaces. Trust me!
Okay, here’s what you need;
1 Canvas (OR) build your own wood frame any size and stretch a prewashed piece of painters drop cloth and air-staple that cloth gooood and tight.
If you stretch your own – buy a bottle of Gesso (in the art dept) to seal the small holes in the fabric and allow it to dry fully before you paint 1-2 hrs.
Pick your colors! We typically use 4-5 colors and something glittery or metallic. However, you can do as many colors as you want. One should be WHITE and one should be BLACK
- Walmart has great, inexpensive bottles of acrylic paint in the craft department – get the bigger or medium size, not the small.
Elmer’s Glue – BIG BOTTLE
Water (grab a big cup or bottle and fill with water)
Popsicle Stir Sticks
Plastic cups that you can toss out
Plastic Sheeting
Folding Table
A work area (maybe a second table)
Spray Brake Parts lubricant – you want it to be SILICONE BASED
Acrylic Clear Spray Sealer
A few things to know before you begin are:
- You will make a mess.
- Your painting with take a few days to dry fully
- everyone who sees it is going to want to know where you got it.
- Be prepared to become addicted to this method. 😉
Prep: The best way to begin is to grab your plastic sheeting and locate the area you will work on your painting. I recommend a flat area, maybe the garage or driveway on a clear non-windy day. Place a large piece of plastic on the ground, then open your folding table and stand it over the plastic. Lay a second piece of plastic over the table. It’s alright if it drapes down, but make sure you won’t be stepping on it while you work. Take a few of your empty dixie cups and turn them upside down on the table, then place your canvas on the cups to keep it up above the table. I recommend having the cups on the edges on the frame so the canvas isn’t pushed up.
A second table or area should also be set up -this will be your work area. Cover this also with a plastic sheeting piece to protect it from the paint.
Mix Flo Medium: To create this painting, we need the paint to flow freely on the canvas. There is special flo medium sold in craft stores for this purpose, but it is costly. To save money, we found that using Elmer’s glue diluted with water makes a great flo medium. Take a dixie cup and fill it half full of glue, then add about 1-2 inches of water to it. Mix well will a popsicle stick. It should not be just slightly thicker than runny. Now, for each cup of paint, you will BEGIN with this flo medium.
Mix Paint: Grab another dixie cup, pour 1 inch of flo medium in the bottom, grab the white paint and squeeze about twice as much of the flo to it. 2 parts paint to 1 part flo. Use a new popsicle stick to mix well. Do this with each color you plan to use. The final step in this process is to take the Spray Brake Fluid and spray a quick spray into each cup of paint. This is how the paint will be encouraged to create cell formations and swirl.
Once you have everything mixed, it’s time to begin!
The best way to start in my opinion is to get a new empty cup. Pour a 1-2 inches of White Paint mixture in, then layer other paint colors of your choice on top of it. Of course, the paint goes down into the center, and you only see ribbons of paint in the cup. DO NOT MIX IT this time. So for instance, maybe I do 2 inches white, then a pour of teal, a pour of yellow, a dot of black and a dot of silver in the cup. This is getting exciting!!
If you have the skills of a ninja you can go to the canvas, any area of it you want, and flip that cup onto the canvas and leave it there upside down, let it sit for a minute then pull it straight up and watch the paint colors flow and run. If you are not a ninja you might need a bit of help to accomplish this.
To help the paint colors run on the canvas, you can lift one end or side and tilt it this way or that. Just be aware that
however you tilt it consistently is how the paint will flow, so do a variety of tilts in different directions. After the intitial pour, you can repeat that using other layering techniques in each cup or do straight pours with single paint colors. Do this all over the canvas and tilt, tilt, tilt until the entire canvas is covered with paint. The paint should flow out over the edges. As I said earlier it will be messy but completely worth it.
Once you are all done, clean up all your left over paint, cups and plastic. Leave your painting to fully dry on a flat surface (preferably how it was set up while you painted) and check on it daily to see how the paint is drying.
A good estimation of paint dry time is 1-4 days. When it’s dry, you can give it two light coats of Acrylic clear coat spray to seal and protect the painting. This will keep it from dulling, and make it easy to dust. Now that you are done, you can frame it if you like and put a hanger on it.
I hope that you will give this Flo Art Method a shot and share with me how it went.