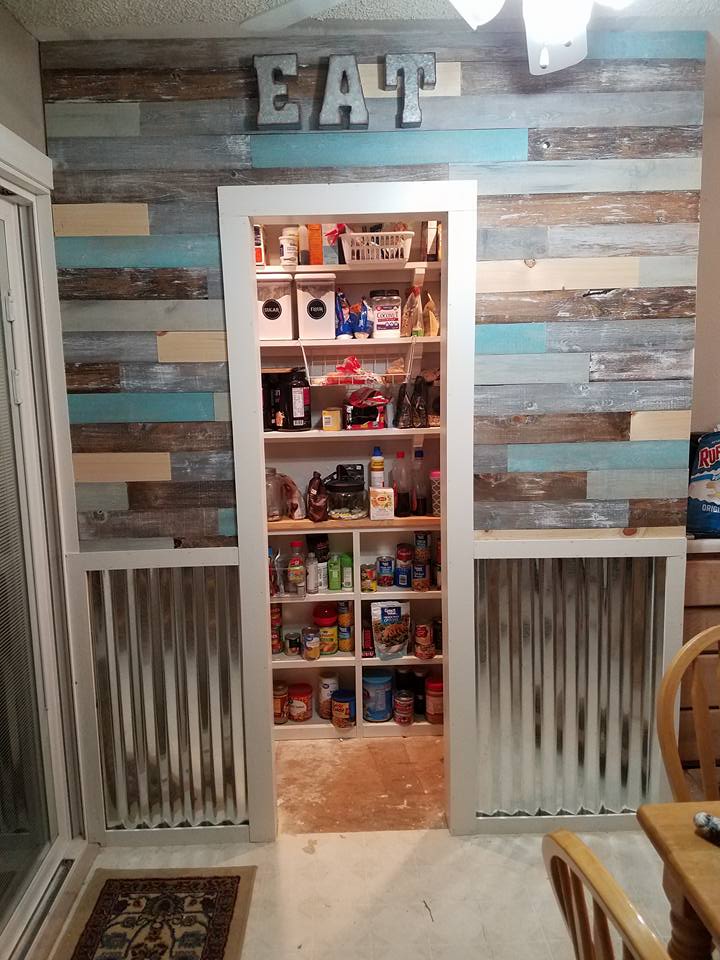
I am so excited to finally show you what our completed pantry looks like!! This reveal has been a long time coming, but trust me – so worth the wait!
In my last post about the pantry build here, I shared with you the craziness of how this remodel came to be and walked you through conception and build. In a separate post I shared my organization tips and tricks. Now, I can share the exterior and finishing touches of the build.
First, full disclosure: this girl (me!!) has a pantry that friends, neighbors, total strangers even – are in awe of. Well, if they aren’t they should be! (Thanks Handy Hubs!) Day after day our family uses this pantry to grab quick snacks, make meals and make memories.
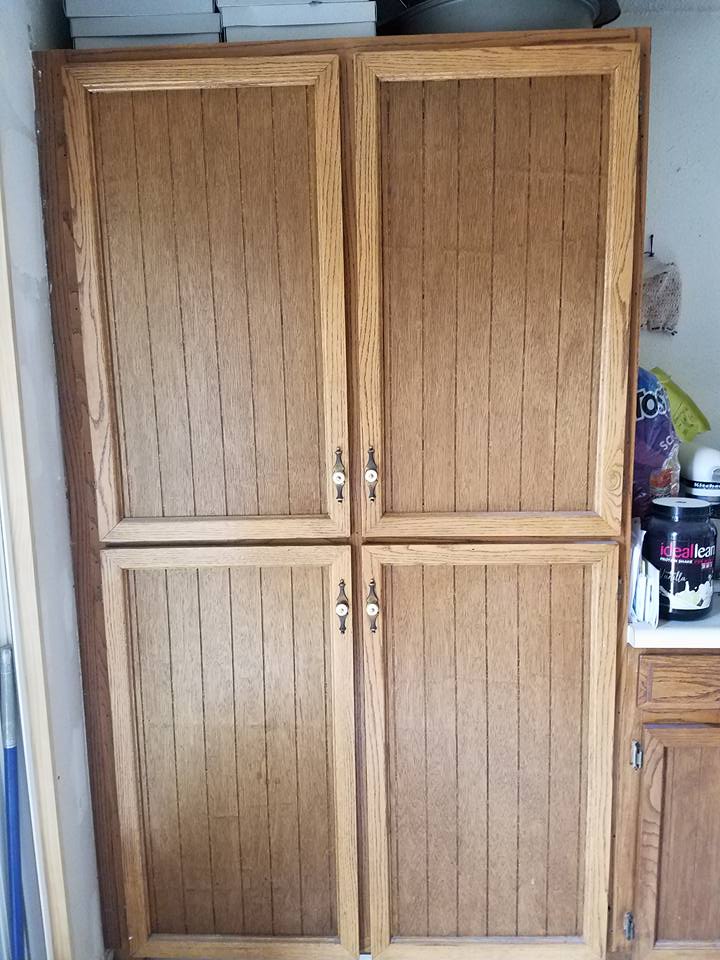
Let’s jump back to the BEFORE …. wow. We have come a Loooonnnnnggggg way friends.
Once we finished the interior of the pantry it was time to focus on the front-facing walls and a door. HandyHubs and I really wanted to give this Pantry some character – make it a focal point of our little kitchen and let it be the shining star. I had an idea to theme the kitchen with a wood-metal-farmhouse type of look.
To begin, we decided to create some custom shiplap and install it over the finished drywall. We first taped, mudded and then painted the drywall and let it dry thoroughly.
For our shiplap this time, we used hardwood instead of plywood. HH pointed out that we would need to plane down the 1″ boards a bit to reduce the thickness of the walls – and basically, he was really just trying to sell me on buying him a planer. Did it work?? Of course it did!!! (Ha Ha Ha)
We selected 1×2″ boards in 8ft lengths for this project… and then we bought a great planer. Once the boards were planed and sanded we laid them out on a few sawhorses for
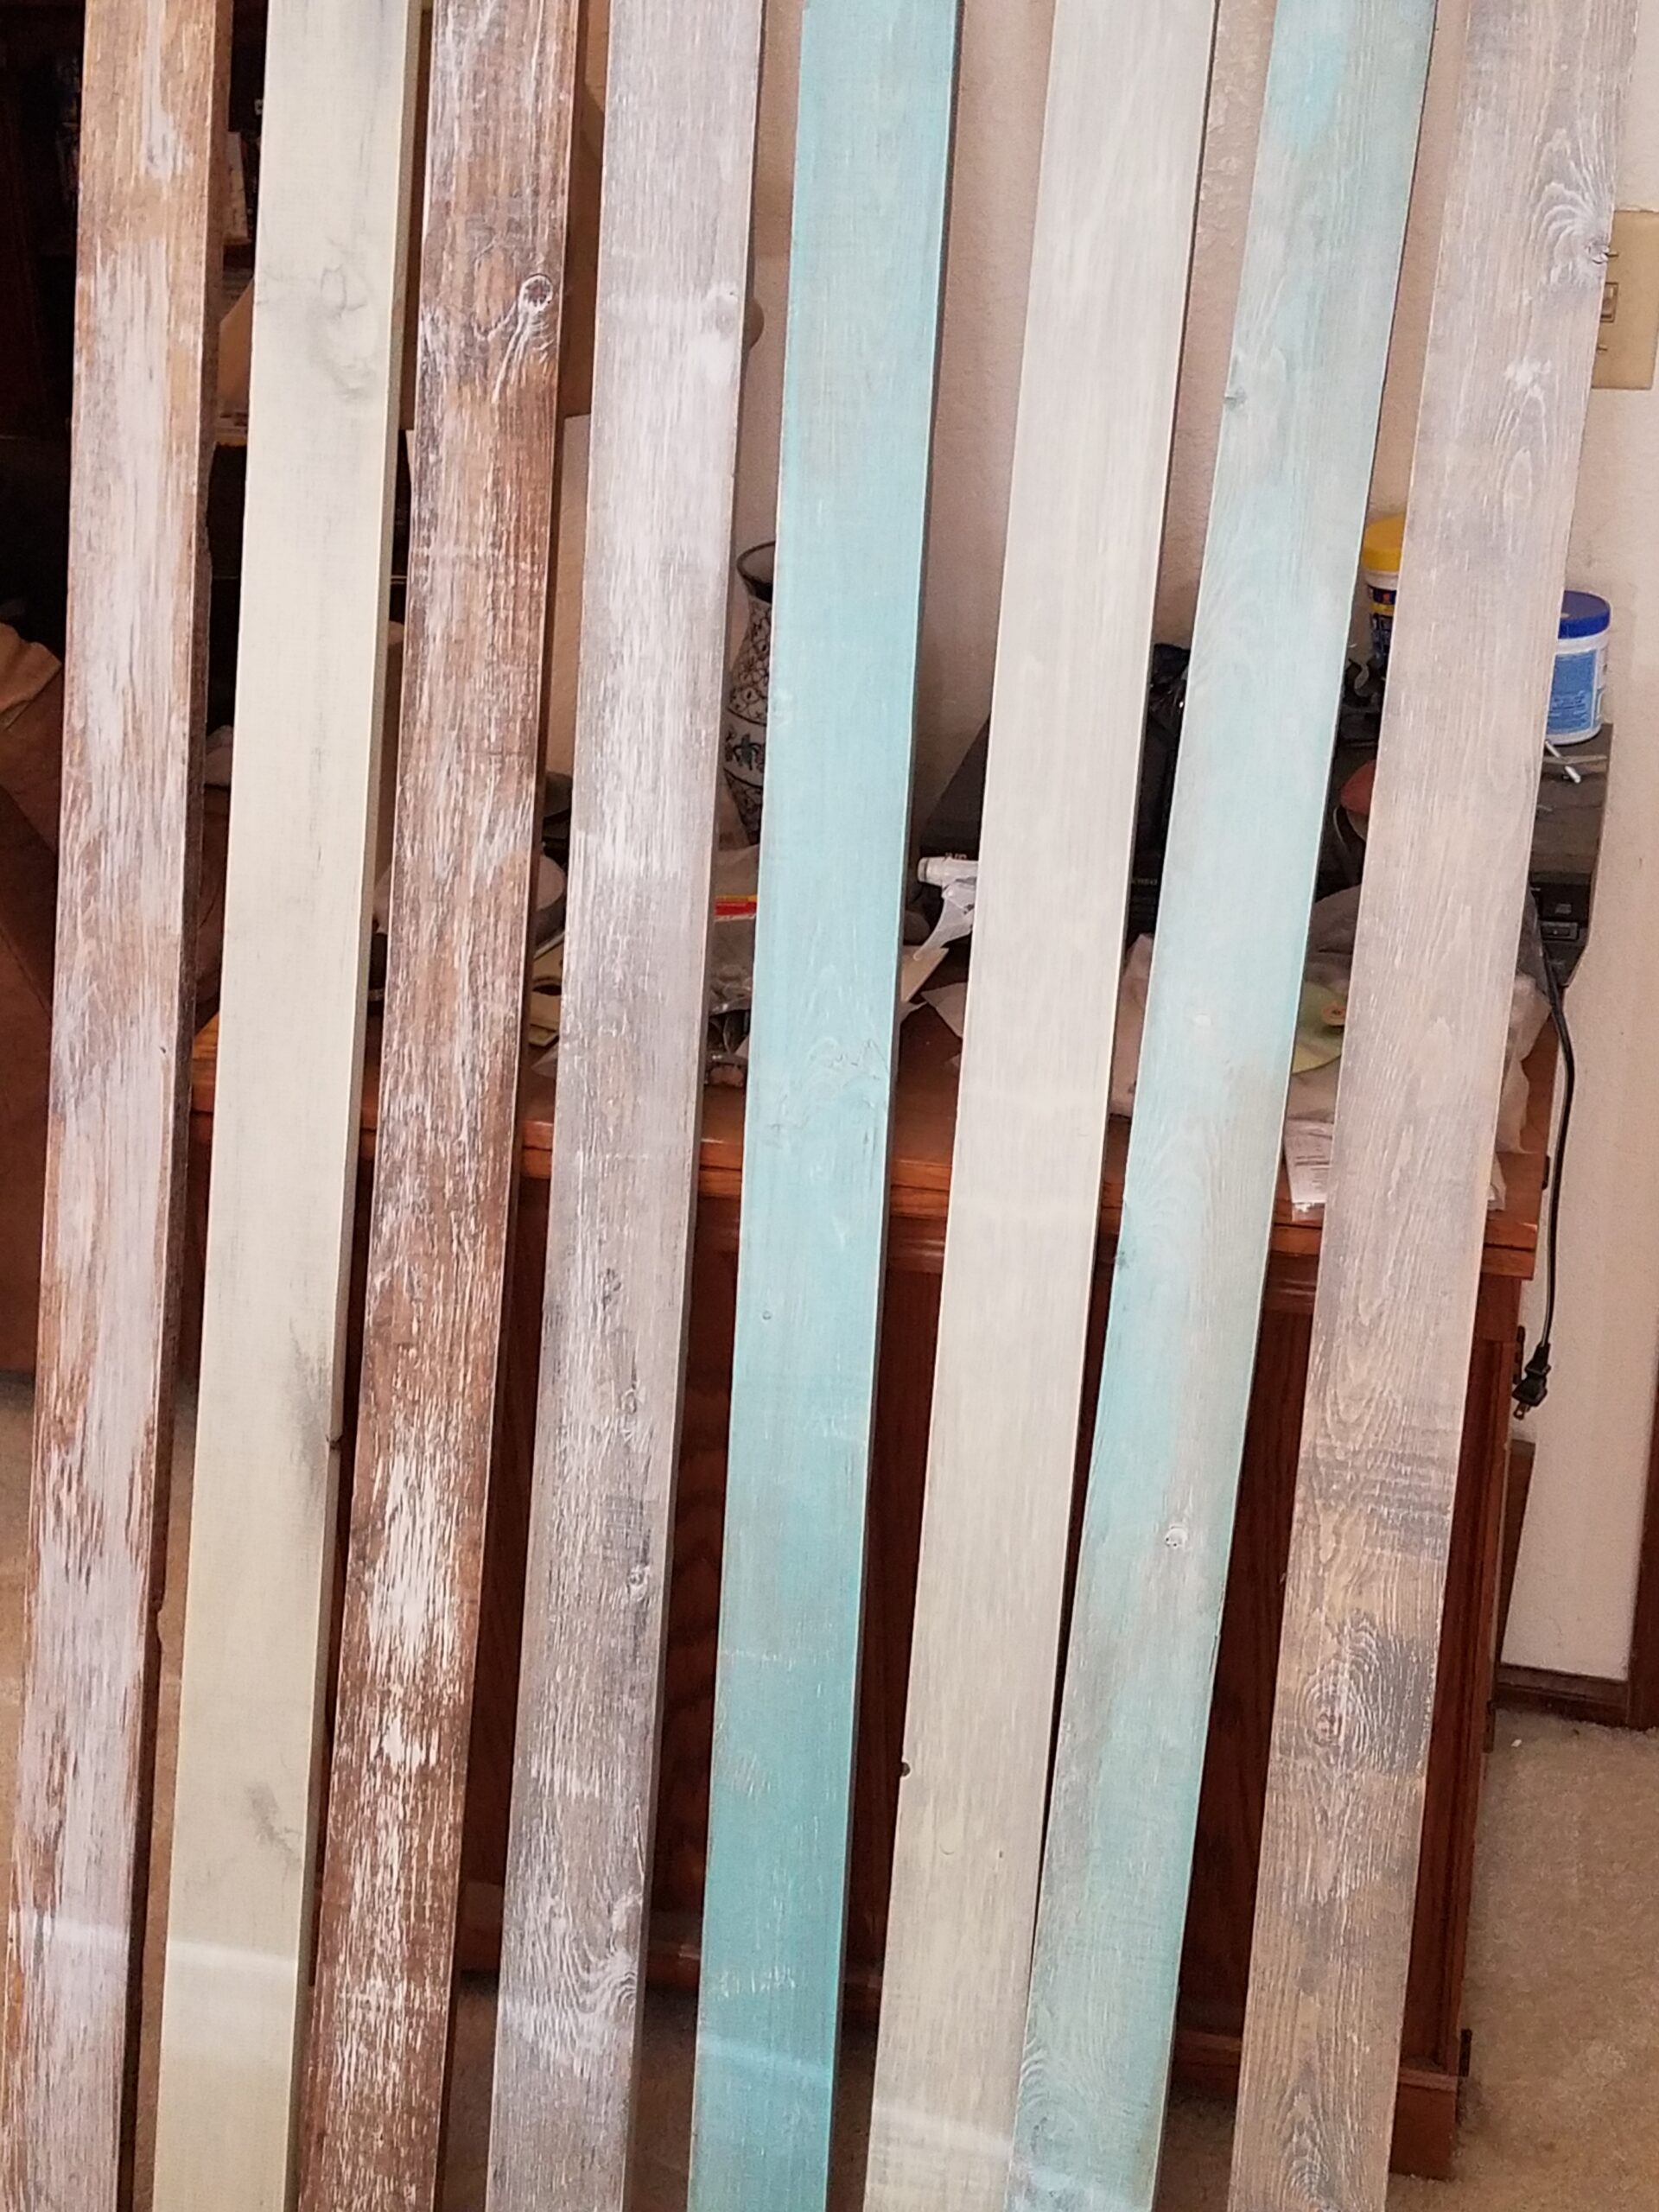
staining. I used an assorted variety of stains and applied thin coats on most of the boards. I then introduced a variety of chalk paint colors into the mix and applied the paint by wiping on and wiping back over the dried stain. Some boards were gray, others were a blue-teal and still others a light green. I then came back with white and dry brushed it over the boards here and there.
To apply the shiplap to the walls, we worked from our back deck. We set up our tools: Miter Saw, Air Nailer, Hammer, and level and got to work. I randomly selected boards and cut them to the lengths I wanted, then handed them off to HH for installation. We did not use glue to apply them, only air nails. In the future, if we decide to remove the planks, we don’t want to have to fight glue and removal. Since the space would not have any humidity, board warping isn’t a major concern.
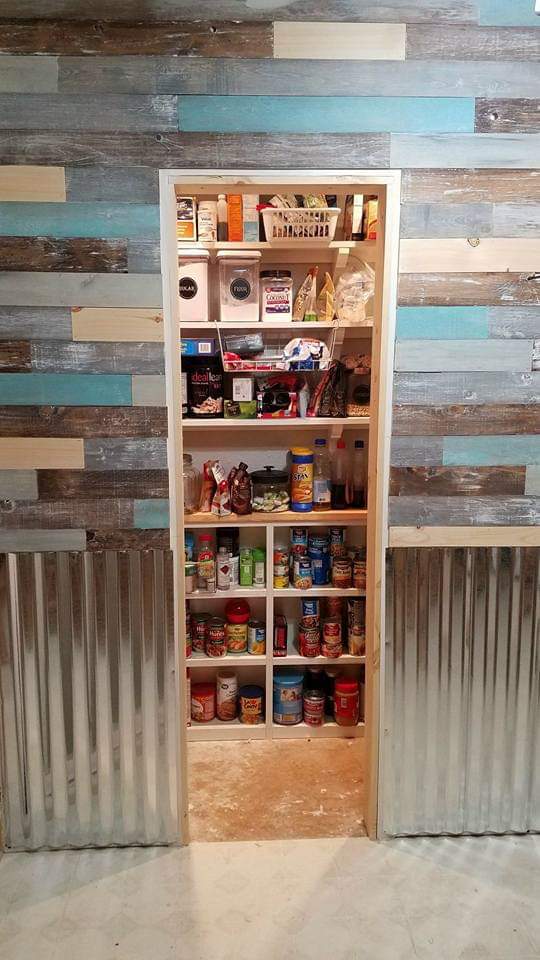
I was careful in my selection so that I did not create a pattern. As we went along, I realized that I wanted to use the unfinished boards sparingly as well. A few of the boards had some interesting knot holes that really look neat. I also decided to only apply the shiplap on half the wall and use galvanized metal along the bottom. I recalled that I had noticed this type of look in a restaurant we had been to and I really liked it.
Once the metal was up, HH framed it in with some of the remaining boards for a finished look. We love how it all turned out… but… we think it’s missing something… hmm. Is there maybe a Pantry Reveal Part III in our future? Check back soon for the rest of this makeover!
Have you created a shiplap feature in your home? We would love to see what you have done! Please comment and share below.