Welcome back!
This month we have done so many things! Maybe its the promise of warmer weather, or the being stuck at home during Covid 19 in 2020….. no idea, but here’s another home project for you to read about.
Our basement is a garden level with one of those shelves that travels around the perimeter. Last year we added some beautiful weathered shiplap to the lower half, re-trimmed the windows and painted. I love how it looks so calm and inviting now, but this one long wall without windows has always been an eyesore to me. I have felt that it needs shelving or a cabinet but not across the entire length.
Okay, the elephant in the room is the ceiling where there’s a darker circle. I just have to call it out – it’s on the to-do list friends! This is where the previously old light fixture was in the basement prior to our installation of our down lights. We have two of these and a third will live here soon as well. So once that light gets redone we will tackle them all at once. Now back to the project at hand… LOL (November 2020 Update: apparently the teenagers that frequent our home call these the ceiling nipples. I have taken care of this now….so embarrassing)
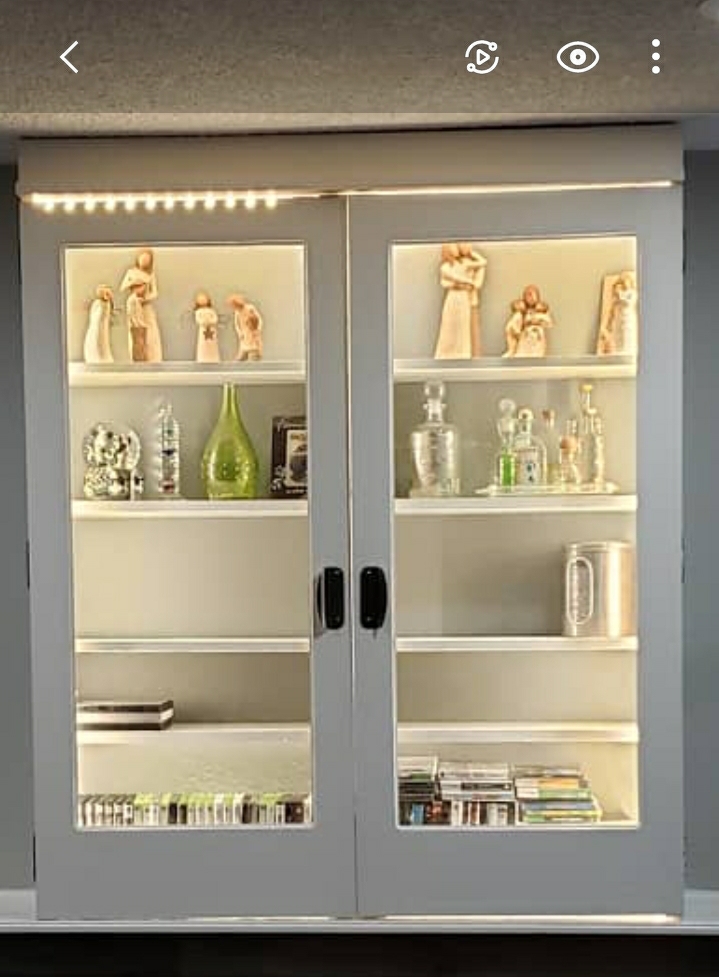
After spending some time looking for inspiration online we came up with a plan for a tall cabinet that basically sits on the shelf, but has glass doors so it’s more of a display rather than storage.
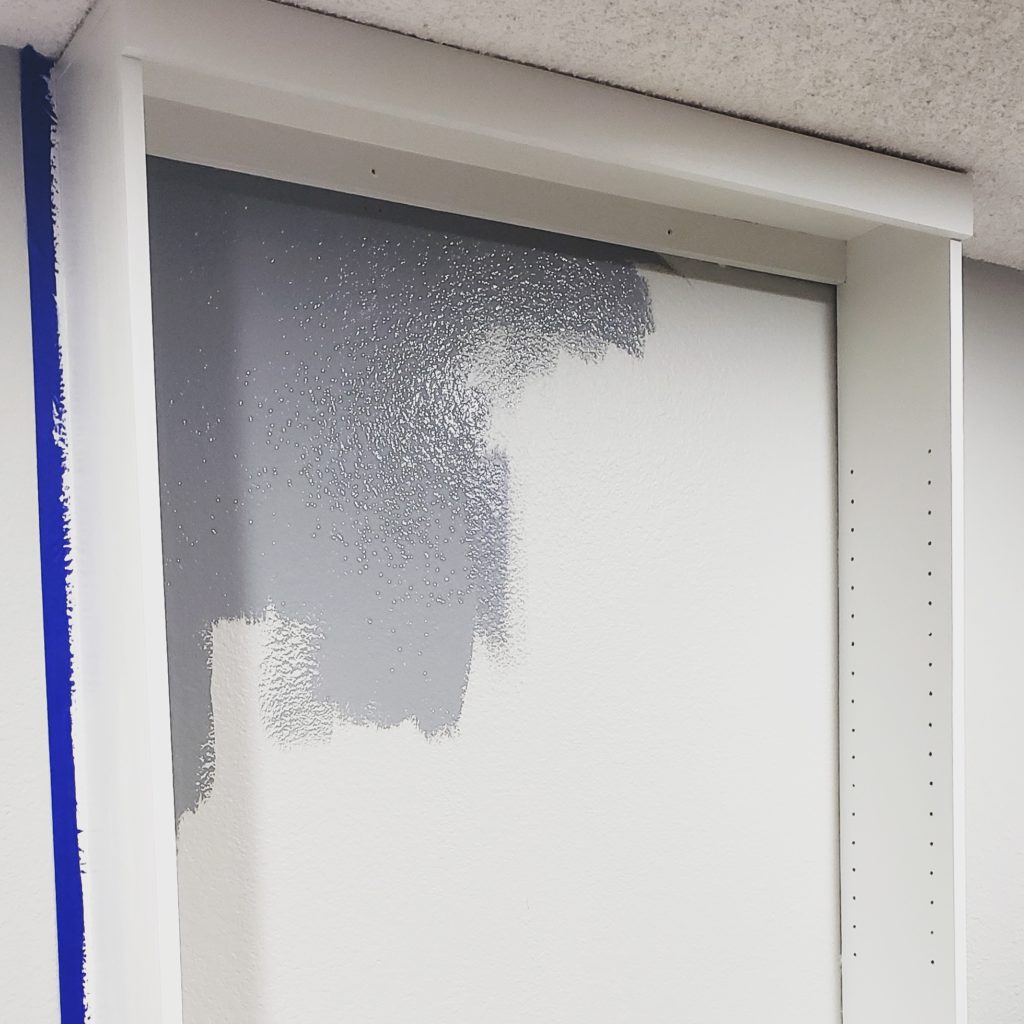
Handy Hubs planed down boards to build the sides, top and shelves. He then built some custom doors and we ordered glass for them. I painted the back of the wall a darker shade of gray then the surrounding walls. I painted the cabinet SW Alabaster White to match the wall and shelf. The handles are beautiful brushed iron finished ones from Magnolia at Target that my sister gifted me with last year.
.
To finish off the cabinet we installed strip lighting around the edge of the interior and set it up on an evening schedule to turn on and off.
Now we have a beautiful dust free space to store our display items.
We have a few final touches to do on this build before it’s fully complete. The top needs a piece of crown molding and the bottom needs a trim board across the front on the inside to help hide that our shelf along the wall is not completely build level (nothing ever is in a home build), and finally some trim that runs along where the cabinet and wall meet.
Thanks for stopping by! I will link in HandyHubs “how I built this cabinet” when his blog post is ready.